Color is often the first detail customers notice on enamel custom products. A bright red badge, glossy pin, or finely outlined pendant can lose its appeal when the shade fades, darkens, or changes after handling. That is why manufacturers must understand how to ensure color fastness of enamel custom products before mass production begins.
Dr. Steven Abbott, a coatings scientist and technical author, has emphasized, “A coating is only as reliable as the surface beneath it.” This principle applies closely to enamel work. Clean metal, controlled surface preparation, and compatible enamel materials create a stronger foundation. Small defects matter. Oil residue, uneven firing, or excessive heat can produce visible color variation.
Reliable production requires more than selecting a beautiful pigment. Technicians should confirm pigment stability, firing temperature, curing time, and coating thickness. A test sample should face sunlight, moisture, rubbing, and repeated handling. Color measurements can also compare the approved sample with later production batches. Delta E testing helps identify changes that the human eye may miss.
Real workshops still encounter surprises. A color can appear correct under factory lighting, then look different outdoors. Metallic surfaces may reflect light unevenly. Even experienced teams sometimes approve a sample too quickly. That mistake deserves review, not excuses. Clear records, repeat testing, and supplier verification improve consistency. The strongest process combines laboratory evidence with practical inspection, because enamel products must survive real use, not merely look perfect on a sample board.
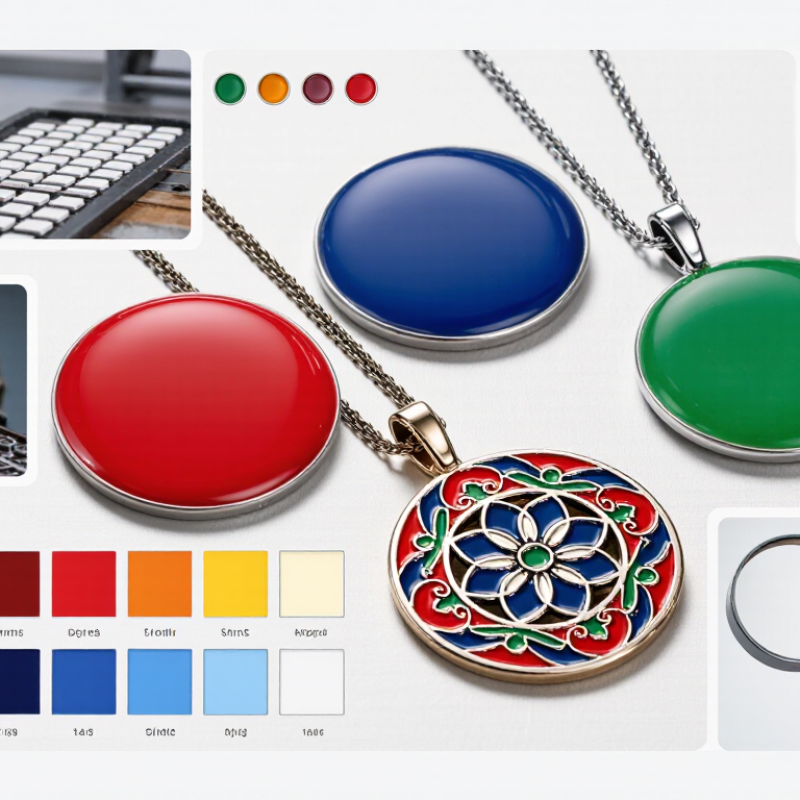
Color fastness in enamel custom products begins with a written requirement, not a visual guess. Define the enamel type, base material, color reference, finish, and intended environment. A badge worn outdoors needs stronger UV resistance than an indoor decorative piece. Specify acceptable color change after washing, rubbing, sweat exposure, and sunlight. Use a measured color difference when possible. Also define the test duration, temperature, moisture level, and inspection lighting. “No visible change” sounds clear, but it is not a reliable technical limit.
From production experience, a small approved sample prevents many arguments. Compare it beside the color reference under controlled light. Check both the enamel surface and the exposed metal edges. A finish may pass a color test yet fail through chipping or staining. Test production samples, not only laboratory panels. Record batch numbers, coating thickness, curing temperature, and test results for traceability. Keep retained samples for later comparison. Our early checks focused too heavily on the wet color. The cured color shifted slightly, and the approved wording did not explain the tolerance. That mistake was avoidable. Requirements should state who approves the sample, what failure means, and when testing must be repeated. Clear limits create dependable decisions, even when the final finish is not perfectly uniform.
Color fastness requirements should be defined by the intended exposure and test method. The chart below compares the rating scales commonly used when evaluating light, rubbing, washing, and perspiration resistance. Higher ratings indicate better resistance.
Reference: ISO 105-B02 uses a Blue Wool light-fastness scale from 1 to 8, while ISO 105-X12, ISO 105-C06, and ISO 105-E04 commonly use gray-scale ratings from 1 to 5. For enamel products, the final acceptance level should be confirmed according to the application, substrate, exposure conditions, and customer specification.
Stable color begins with pigment selection, not final inspection. Choose enamel pigments rated for heat, light, moisture, and chemical exposure. Inorganic pigments often provide stronger heat stability than many organic alternatives, although their color range can be narrower. A 2024 Grand View Research report estimates the global pigments market will grow at about 4% annually, reflecting wider demand for durable coloration.
Base material compatibility matters just as much. Glass, ceramic, steel, and coated aluminum expand at different rates during firing. That movement can create microcracks, dull patches, or edge fading. Test the pigment and substrate together under the planned firing cycle. Use CIE L*a*b* readings before and after testing, then track ΔE rather than relying only on visual checks. ISO 105-A02 provides a recognized grey-scale approach for evaluating color change, but enamel projects still need application-specific trials. Standards guide decisions. They do not replace experience.
Tips: Keep pigment batches sealed and dry. Record firing temperature, dwell time, coating thickness, and substrate lot. Expose samples to light, moisture, and mild cleaning agents. Compare results after seven and thirty days. A 2023 technical report from a materials-testing laboratory found that small process changes can produce measurable color differences, though the exact result depends on pigment chemistry and surface preparation. This is where many teams become overconfident. More testing is usually cheaper than reworking a finished batch.
How to Ensure Color Fastness in Enamel Custom Products?
Color stability begins inside the kiln, not after inspection. In production checks, I have seen slight temperature changes create visible shifts in red, blue, and pale yellow enamel. Heat changes everything. Set the kiln according to the enamel supplier’s firing range, substrate, and coating thickness. A calibrated thermocouple helps confirm the actual workpiece temperature. The displayed kiln temperature may not match the surface temperature.
Control the heating rate, peak temperature, and holding time together. A rapid rise can trap gases and produce pinholes, while excessive heat may burn delicate pigments or soften sharp details. Use test pieces before firing a large batch. Place them near different kiln zones, because airflow and heating patterns can vary across the chamber. Keep records.
Cooling also affects the final appearance. Allow products to cool gradually, especially when metal and enamel expand at different rates. Sudden cooling may cause fine cracks, dull areas, or weak adhesion. Inspect each test piece under consistent daylight, then compare it with an approved color standard. Instrument readings can support this process, but they do not replace trained visual inspection.
A perfect firing chart can still mislead. Humidity, powder thickness, surface preparation, and kiln loading may change the result. I once treated identical settings as reliable, but a heavier load produced a slightly darker finish. That mistake showed why firing conditions need regular review, not blind repetition. Adjust one variable at a time and document every change.
| Control Dimension | Recommended Control Range | Color-Fastness Risk | Inspection Method | Corrective Action |
|---|---|---|---|---|
| Peak firing temperature | Approximately 750–850 °C, according to the enamel formulation and substrate | Low temperature may leave the coating under-fused; excessive heat can cause fading, burning, or color shift | Calibrated thermocouple, furnace data logger, and fired sample comparison | Adjust the furnace set point and verify the actual part temperature rather than relying only on the display reading |
| Firing time | Use the enamel supplier's validated cycle; many small coated parts require only a short peak-temperature exposure | Over-firing can darken or flatten color; under-firing can produce weak gloss and uneven coverage | Record heat-up, peak exposure, and cooling stages for every production batch | Separate heating time from soak time and establish a documented standard firing recipe |
| Heating rate | Use a controlled ramp suitable for the enamel thickness and base material; avoid abrupt temperature changes | Rapid heating may create pinholes, bubbling, cracking, or uneven color development | Review the furnace temperature curve and inspect the surface under consistent lighting | Reduce the ramp rate, improve part spacing, or apply thinner and more uniform enamel layers |
| Cooling rate | Allow controlled cooling; avoid forced air or contact with cold surfaces immediately after firing | Thermal shock can cause crazing, edge chipping, cracking, and apparent color variation | Visual inspection at room temperature and crack detection under magnification | Increase cooling time inside the furnace and keep hot parts away from drafts |
| Coating thickness | Maintain a consistent deposit according to the enamel system; avoid visibly thin edges and heavy pools | Thickness variation changes opacity, gloss, apparent hue, and firing response | Check coverage at edges, corners, recessed areas, and large flat surfaces | Standardize application volume, curing time, spraying distance, or powder distribution |
| Substrate cleanliness | Surface must be free from oil, dust, moisture, loose oxides, and processing residues | Contamination can cause fish-eyes, blisters, poor adhesion, and localized discoloration | Wipe test, visual inspection, and adhesion check after firing | Improve degreasing, drying, preheating, and handling controls before coating |
| Furnace atmosphere | Maintain a stable, clean atmosphere appropriate for the enamel and metal substrate | Fumes, excessive oxidation, or combustion residues may alter surface color and gloss | Monitor ventilation, furnace cleanliness, and batch-to-batch color appearance | Clean the furnace, improve exhaust control, and prevent incompatible materials from firing together |
| Color measurement | Set a master sample and define an agreed visual or instrumental tolerance before production | Uncontrolled lighting and viewing angles can hide gradual batch-to-batch color drift | Use standardized daylight viewing and, where available, a spectrophotometer for color difference checks | Quarantine out-of-tolerance batches and trace the firing curve, coating lot, and substrate lot |
| Post-firing durability | Confirm resistance requirements for handling, washing, abrasion, chemicals, and light exposure | A visually correct color may still lose gloss or change shade during use | Apply relevant abrasion, chemical, adhesion, and lightfastness tests to representative samples | Review enamel selection, firing cycle, surface preparation, and required service conditions |
Note: The recommended firing window is a general processing reference. The final firing temperature, time, atmosphere, and coating thickness should be validated with the specific enamel formulation, substrate, furnace, and product design.
Color fastness in enamel custom products depends on testing, not appearance alone. A bright sample can fade after a few hours near a window. In production work, I test the cured surface under controlled conditions before approving a batch. Light exposure is critical. Use a recognized method, such as ISO 105-B02, or a comparable accelerated light test. Record the starting color with a calibrated spectrophotometer. Compare it afterward using ΔE values. Keep an unexposed control piece beside every test panel.
Heat can change both pigment and gloss. Place samples through repeated temperature cycles reflecting shipping, storage, and daily use. Check for yellowing, cracking, bubbling, or softening after each cycle. Do not test only at one extreme. Real products face short heat spikes and long warm periods. Chemical resistance needs practical contact tests. Apply diluted detergent, skin oil simulant, alcohol, and household cleaners separately. Leave each liquid for a fixed time, then wipe gently. Inspect under neutral light. Strong solvents may create unrealistic results, so record them separately.
Wear testing should imitate handling, not just laboratory rubbing. Use controlled abrasion or repeated cloth strokes with measured pressure. Examine edges, raised enamel, and printed details. These areas usually fail first. I once approved a sample because its center stayed vivid; the edges had already dulled. That mistake changed our inspection checklist. Test only after full curing. Document humidity, coating thickness, cycle count, and photographs. Have another person review the results. Fresh eyes catch convenient assumptions. Store the approved control sample with the batch record.
Color fastness in enamel custom products depends on controlled materials and careful inspection. A glossy surface can still hide weak adhesion or uneven curing. Production teams should inspect incoming enamel, metal blanks, and printed color references before coating begins. Record the enamel batch, mixing ratio, application thickness, and oven temperature. Small variations can create visible differences between samples and mass production.
Use both visual and physical checks. Inspect color under consistent daylight and neutral indoor lighting. Compare each piece with an approved reference sample. Check for pinholes, cloudy areas, edge gaps, and uneven gloss. A dry-rub test can reveal early color transfer. A controlled abrasion test offers stronger evidence. For selected samples, evaluate adhesion after curing and inspect the surface under magnification. Heat and mild chemical exposure may also reveal fading that visual checks miss.
Process adjustments should follow measured results, not assumptions. If color fades near edges, review coating thickness and curing time. If scratches expose the base metal, improve surface cleaning or enamel bonding. Our earlier inspections relied too heavily on appearance, and that was not enough. A passing sample may still represent an unstable process. Keep test records by batch and review repeated defects with production staff. Sometimes a lower oven temperature works better, but only after testing hardness and adhesion. Small corrections can improve consistency without adding unnecessary processing steps.
Define the enamel type, base material, color reference, finish, and intended environment.
Compare a production sample beside the color reference under controlled lighting.
Record the starting color with a calibrated color measurement device.
Expose cured samples under controlled light conditions for a specified duration.
Use repeated temperature cycles that reflect shipping, storage, and daily use.
Test diluted detergent, skin oil simulant, alcohol, and household cleaners separately.
Use controlled rubbing or abrasion with measured pressure and repeated cycles.
Record enamel batch numbers, mixing ratios, coating thickness, and curing temperature.
How to ensure color fastness of enamel custom products begins with clearly defining performance requirements, including acceptable color variation and the environments the product will face. Selecting stable enamel pigments and compatible base materials is equally important, as their chemical and thermal properties can strongly influence the final appearance. Careful control of firing temperature, heating time, and cooling speed helps prevent fading, discoloration, cracking, or uneven tones during production.
Color durability should be tested under conditions such as prolonged light exposure, heat, moisture, chemicals, and repeated handling or friction. These tests reveal potential weaknesses before products reach customers. To improve consistency, manufacturers should establish inspection standards for color, surface quality, and adhesion, while recording key process data for comparison. If problems appear, adjustments to pigment ratios, material preparation, firing parameters, or handling procedures can be made systematically. Combining suitable materials, controlled processing, and ongoing quality checks creates enamel custom products with attractive, stable colors and dependable long-term performance.

TOP Crafts